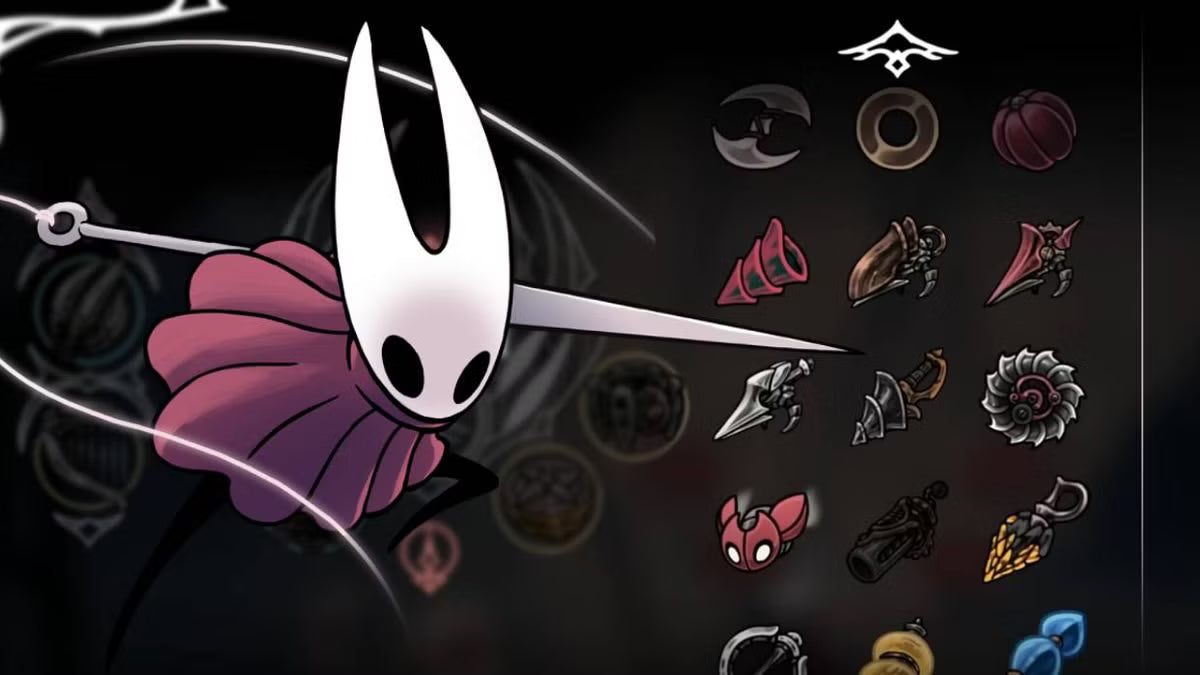
Silksong tools are the items Hornet equips on her Crest to fight, survive, and explore. Red tools deal damage and refill at benches with Shell Shards, blue tools give passive combat support, and yellow tools make travel and collecting easier. Start with Compass and Druid's Eye, then build around a damage tool like Tacks or Cogfly.
Hollow Knight: Silksong throws a lot at you in the first few hours, and Hornet's needle only takes you so far. The real depth comes from what you carry with you, and that is where Silksong tools come in. They change how you fight, how you heal, and how quickly you move through Pharloom.
Tools can feel confusing at first because they are split into colors, tied to your Crest, and refilled in different ways. Once the system clicks, the whole game opens up. Boss fights get easier, exploring gets faster, and you can build a style that fits how you like to play.
This guide covers what each type of tool does, the best Silksong tools to grab early, the standout picks in every color, and a few habits that will save you a lot of frustration. If you enjoy how well-designed weapons feel in games, you may also like our breakdown of which RPG has the best weapon design.
What Are Tools in Hollow Knight Silksong?
Tools are items Hornet equips on her Crest to gain extra attacks, defenses, or utility. You pick them up from quests, secret rooms, bosses, and vendors across Pharloom, and you can only change them while sitting at a bench or rest spot. Every one of the Hollow Knight Silksong tools falls into one of three colors.
Red, blue, and yellow. Every one of the Silksong tools belongs to one of these groups, and your Crest decides how many of each you can equip.
Red Tools
Red tools are your offensive tools. Think throwing pins, traps, boomerangs, and little robotic helpers. They have a limited number of uses, and they refill when you rest at a bench, which costs Shell Shards. Examples include Straight Pin, Tacks, Sting Shard, Curveclaw, and Cogfly.
Blue Tools
Blue tools are passive. Once equipped, they quietly improve how Hornet fights or survives. Druid's Eye gives you Silk when you take damage, Reserve Bind gives you one emergency heal per rest, and Weavelight speeds up how fast you regain Silk.
Yellow Tools
Yellow tools handle exploration and resource gathering. Compass shows where you are on the map, Magnetite Brooch pulls in nearby Rosaries, and Dead Bug's Purse helps you keep some of your Rosaries if you die. They rarely win a boss fight on their own, but they make every trip smoother.
How Do Tool Slots, Pouches, and Crafting Kits Work?
Your Crest controls how many tools you can bring along, so understanding slots is a big part of building a loadout. Here is how the supporting systems fit together:
- Memory Lockets: Each one lets you unlock an extra slot for a tool type on your current Crest. Those slots do not follow you if you switch to a different Crest.
- Tool Pouches: These increase how many uses your red tools can hold, so you can throw more before you need to rest.
- Crafting Kits: These make your equipped tools stronger, either by boosting red tool damage or by improving the defensive side of blue tools.
- Shell Shards: This is the resource you spend to refill red tools at a bench. Almost every enemy drops them, so you will rarely run dry.
- Craftmetal: Some tools, like Cogfly and Sting Shard, need this to be made or bought, so save it for the ones you will actually use.
A good rule is to spend your early Memory Lockets on the tool type that fits your current problem. If bosses are punishing you, add a blue slot. If you keep getting lost, add a yellow one.
What Are the Best Silksong Tools for Early Game?
You do not need a perfect loadout in the first few areas. A few simple picks will carry you a long way, and most of them are easy to find or buy.
Compass
The Compass is a yellow tool you can buy from Shakra for 70 Rosaries. It shows Hornet's position on the map, which sounds small until you are deep in a maze of vertical rooms and cannot tell which way you came from. Most players keep it equipped for the entire game.
Druid's Eye
Druid's Eye is a blue tool that earns you Silk whenever Hornet takes damage. Since Silk powers healing, this tool turns a rough exchange into a chance to recover. It comes from the Moss Druid quest, and it stays useful from the first area to the last.
A Reliable Throwing Tool
Early on, you want at least one red tool that lets you hit enemies from a distance. Straight Pin is a solid starting option for chipping away at flying enemies and for finishing off foes you do not want to get close to. As you find better red tools, you can swap it out.
Do not hoard your red tools. They refill at a bench for Shell Shards, and almost every enemy drops those, so use them freely and save your needle for the moments when you really need to stay close.
Which Red Silksong Tools Are Worth Equipping?
Red tools are where most of the experimenting happens with Silksong tools. A few of them stand out because they work in almost every situation.
Tacks and Sting Shard for Control
Tacks scatter short pins along the ground, piercing any enemy that walks over them. Sting Shard works like a trap of blades that damages anything that touches it. Both reward you for placing them before a fight gets messy, and both are great when you need space to breathe.
Cogfly for Hands-Off Damage
Cogfly sends out flying helpers that seek out and damage nearby enemies. It is crafted at a bench in the High Halls using Craftmetal, and it is a great pick when a boss keeps moving and you want some damage landing while you focus on dodging.
Curveclaw and Longpin for Tricky Enemies
Curveclaw is a curved throwing tool that works well against flying enemies, and you can buy it from Mottled Skarr for 140 Rosaries. Longpin is built to pierce tough shells, which makes it handy against armored enemies that shrug off your normal attacks.
Which Blue and Yellow Silksong Tools Make the Biggest Difference?
Blue Tools Worth Chasing
Beyond Druid's Eye, Reserve Bind is one of the strongest blue picks. It gives you a single emergency Bind per rest, which can save a run when a boss catches you at low health. Weavelight is a great option if you rely heavily on Silk skills, since it speeds up how fast your Silk fills back up.
Warding Bell is also worth a look if you struggle with healing under pressure. It provides a shield while you Bind, giving you a little breathing room in the middle of a fight.
Yellow Tools Worth Chasing
Magnetite Brooch is an easy buy for 120 Rosaries from Pebb, and it saves you from walking over every drop by hand. Shard Pendant makes enemies drop more Shell Shards, which keeps your red tools topped up. If you tend to lose Rosaries to deaths, Dead Bug's Purse is a smart safety net.
How Do the Top Hollow Knight Silksong Tools Compare?
Here is a quick side-by-side of the tools that come up most often in player builds, so you can decide what to chase first.
| Tool | Type | What It Does | Best For |
|---|---|---|---|
| Compass | Yellow | Shows Hornet's location on the map | Every player |
| Druid's Eye | Blue | Earns Silk when you take damage | Keeping healing available |
| Reserve Bind | Blue | Gives one emergency Bind per rest | Tough boss fights |
| Tacks | Red | Scatters piercing pins along the ground | Controlling space |
| Sting Shard | Red | Places a blade trap that pierces enemies | Slow or predictable enemies |
| Cogfly | Red | Sends helpers to damage nearby enemies | Hands-off damage |
| Curveclaw | Red | Throws a curved blade | Flying enemies |
| Magnetite Brooch | Yellow | Collects nearby Rosaries automatically | Faster exploring |
How Should You Build Your Tool Loadout?
There is no single best setup, but a few habits make building a loadout much easier. Start by thinking about what is giving you trouble. If a boss is fast and hard to hit, bring a tool that damages without needing you to commit. If an area is full of flying enemies, bring something that reaches them.
Mix your types instead of stacking one color. A balanced loadout of Silksong tools, with a damage tool, a safety net like Reserve Bind, and a utility pick like Compass will handle most situations. Because you can only swap at a bench, it also helps to check the next area's enemies before you leave a rest spot.
Finally, do not be afraid to test new tools. Most of the best Silksong tools are only a short trip, a purchase, or a quest away, and part of the fun is finding combinations that feel like yours.
If Hornet's weapon has you hooked, our Hornet's Needle replica is a great way to bring a piece of Pharloom to your shelf. You can also browse the rest of our Silksong replica collection or check out our swords collection for more blades inspired by your favorite games.
Frequently Asked Questions
It depends on your Crest. Each Crest sets how many red, blue, and yellow slots you start with, and Memory Lockets let you unlock an extra slot for each tool type. Those added slots stay tied to the Crest you used them on.
Yes, red tools have a limited number of uses. They refill every time Hornet sits at a bench or rest spot, and the refill costs Shell Shards, which drop from almost every enemy.
Compass and Druid's Eye are the easiest early picks. The Compass keeps you from getting lost, and Druid's Eye gives Hornet Silk when she takes damage, which keeps your healing available during rough fights.
No. You can only change your loadout while sitting at a bench or rest spot, so think about the area and boss ahead before you stand back up.
The tools themselves stay in your collection, but extra slots from Memory Lockets are locked to the Crest you spent them on. Switching Crests means working with that Crest's own slots.
Browse replicas inspired by Hollow Knight: Silksong and show off your favorite game on your shelf.
Shop Silksong Replicas →

